NVENC AV1
NVIDIA GPU-Accelerated AV1 Encoding
Any NVIDIA GPU from 2022 onwards supports hardware-accelerated AV1 encoding, such as the GeForce RTX 40 Series (Ada Lovelace) and the NVIDIA RTX 6000 Ada (Professional GPU).
Encoding speed of dual NVENC chip graphics cards, such as the RTX 4070 Ti is faster than a single NVENC chip GPU, such as the RTX 4070 Super. A 1080p 24fps video encodes at 340 fps average on my 4070 Super with Ultra Quality tuning, and "very slow" preset! While the same video encodes at 18fps for SVT-AV1 at preset 3 using Av1an. The Av1an CLI encoder is the second fastest encoding method currently possible, as it splits the video into chunks for parallel encoding utilizing only the CPU and RAM. NVENC is primarily designed for real time encoding for recording and streaming, but it is also valuble for regular encoding because of the great amount of time it can save! The trade off is the output video is genereally larger for the same visual quality as that of CPU encodes.
-
Ensure you already have installed FFmpeg and understand basic usage. If not, read: Tool Installation & Preparation.
-
The following encoding command is a starting point provides high-quality encoding for most videos, preserving detail efficiently while keeping file sizes manageable:
ffmpeg -y -hwaccel cuda -hwaccel_output_format cuda -i input.mkv -map 0 -c:v av1_nvenc -cq 30 -spatial-aq 1 -temporal-aq 1 -preset p7 -tune hq -rc-lookahead 32 -an encoded_output.mkv
Breakdown of the Command
Base Command & Input
-
ffmpeg: The command-line tool for processing multimedia files. -
-y: Optional. Overwrites the output file without prompting if one exists. -
-hwaccel cuda: Uses NVIDIA CUDA for hardware-accelerated decoding. -
-hwaccel_output_format cudaKeeps the decoded video frames in CUDA memory (faster GPU-to-GPU processing). -
-i input.mkv: Specifies the input file. Specify the path to the file location.
Stream Mapping & Output Configuration
-map 0: Includes all streams (video, audio, subtitles, etc.) from the input. If you get an error in the terminal, exclude this.
Video Encoding Settings
-
-c:v av1_nvenc: Uses NVIDIA's AV1 hardware encoder for the video stream. -
-cq 30: Sets constant quality mode with a CQ (Constant Quantizer) value of 30 (higher = more compression, lower quality). A value of 30 is a good balance of detail preservation/quality and resonable file size. If you are going for visully lossless for archiving I would not go lower than CQ 16 unless you are ok with large file sizes. -
-spatial-aq 1: Enables spatial adaptive quantization (improves detail in complex areas). -
-temporal-aq 1: Enables temporal adaptive quantization (adjusts quality over time to maintain visual consistency). -
-preset p7: Encoding speed/quality trade-off. p7 is the slowest and highest-quality preset for NVENC, offering the best compression efficiency (maximum quality per bit). As you lower the value (e.g., toward p1), the encoder uses fewer analysis passes, resulting in lower visual quality and larger file sizes at a given bit budget. For example: Encoding a ten second 2160p 24fps HDR animation with the example FFmpeg command using -preset p5 instead of p7 resulted in a 29% faster encode time, a 0.33% decrease in file size, but slightly noticeable artifacting in scenes. Still acceptable quality and file size:
# preset p5 with the example FFmpeg command:
frame=  236 fps=104 q=29.0 Lsize=    4165KiB time=00:00:09.84 bitrate=3466.5kbits/s speed=4.32x elapsed=0:00:02.27
# preset p7 with the example FFmpeg command:
frame=  236 fps= 80 q=30.0 Lsize=    4179KiB time=00:00:09.84 bitrate=3478.0kbits/s speed=3.35x elapsed=0:00:02.94
-
-tune hq: Tunes the encoder for high quality output (alternative to low-latency, etc.). Using low-latency will resut in a faster encode, but greatly bloats the file size. While-tune uhq, which was introduced in Feb 2025, will shrink some videos by more than 50% in my testing. While some video files only shrink by 5% for the same visual quality. The trade off with using -tune uhq is the encode time increased by about 4 times on average in my testing. That is still a fast encode. A 1080p 24fps video will encode at about 90 fps! -
-rc-lookahead 32: Sets rate control lookahead to 32 frames (helps the encoder decide how to allocate bits more effectively).-rc-lookahead 60: Maximize temporal analysis — ideal for slow pans, fades, and static scenes like anime. Using values lower than 32 does not speed up encoding time in my testing on my RTX 4070 Super.
Audio & Subtitle Handling
-
-an: Removes audio from the output file so you can process the audio seperately then/or mux in a different audio track you may have. For my personal videos I have filmed, edited encoded I just keep the audio as lossless format and let Youtube encode it when I upload it there: -
-c:a copy: Copies over the source audio into the new encoded video.
But you may want to just encode the audio during the video encoding process, to a codec like Opus. See, Audio Format for other audio options and if you would like help determining what format and bitrate is suitable for your stereo or surround audio.
Output File
encoded_output.mkv: Specifies the name of the output file.
RTX 50 series GPUs, introduce the 9th-generation NVENC encoder. This updated encoder adds support for YUV422 chroma subsampling in AV1 encoding, accommodating both 8-bit and 10-bit depths. You can still encode 10-bit YUV420 with RTX 40 series GPUs.
Comparisons
Here is a side by side comparison of the encoded AV1 output from the example command beside the 4K (UHD) source. The main difference you will notice is that the NVENC AV1 version partially smoothes the film grain. However what it retains is just enough to enjoy some grain aesthetic. Some frames have more smoothed out grain that others creating inconsistency of grain prominence, but it's less noticable during playback. Retaining original grain is for the most part not a good idea if you want small output files as the file increasingly grows with using lower compression settings. With VVenC, Aomenc (AV1) or SVT-AV1 film grain synthesis is an option to solve the issue of adding grain without bloating the file size. Because this example has consistent grain across every scene, you could encode with VVenC or SVT-AV1 instead and use film grain synthesis if you want to reduce the file size further. The file size of the original 10 second UHD HEVC clip was 541 MB (no audio) and the NVENC AV1 encode was 37.2 MB (no audio)!
Download a PNG side by side screenshot of the source vs the AV1 NVENC compressed version to see the difference:
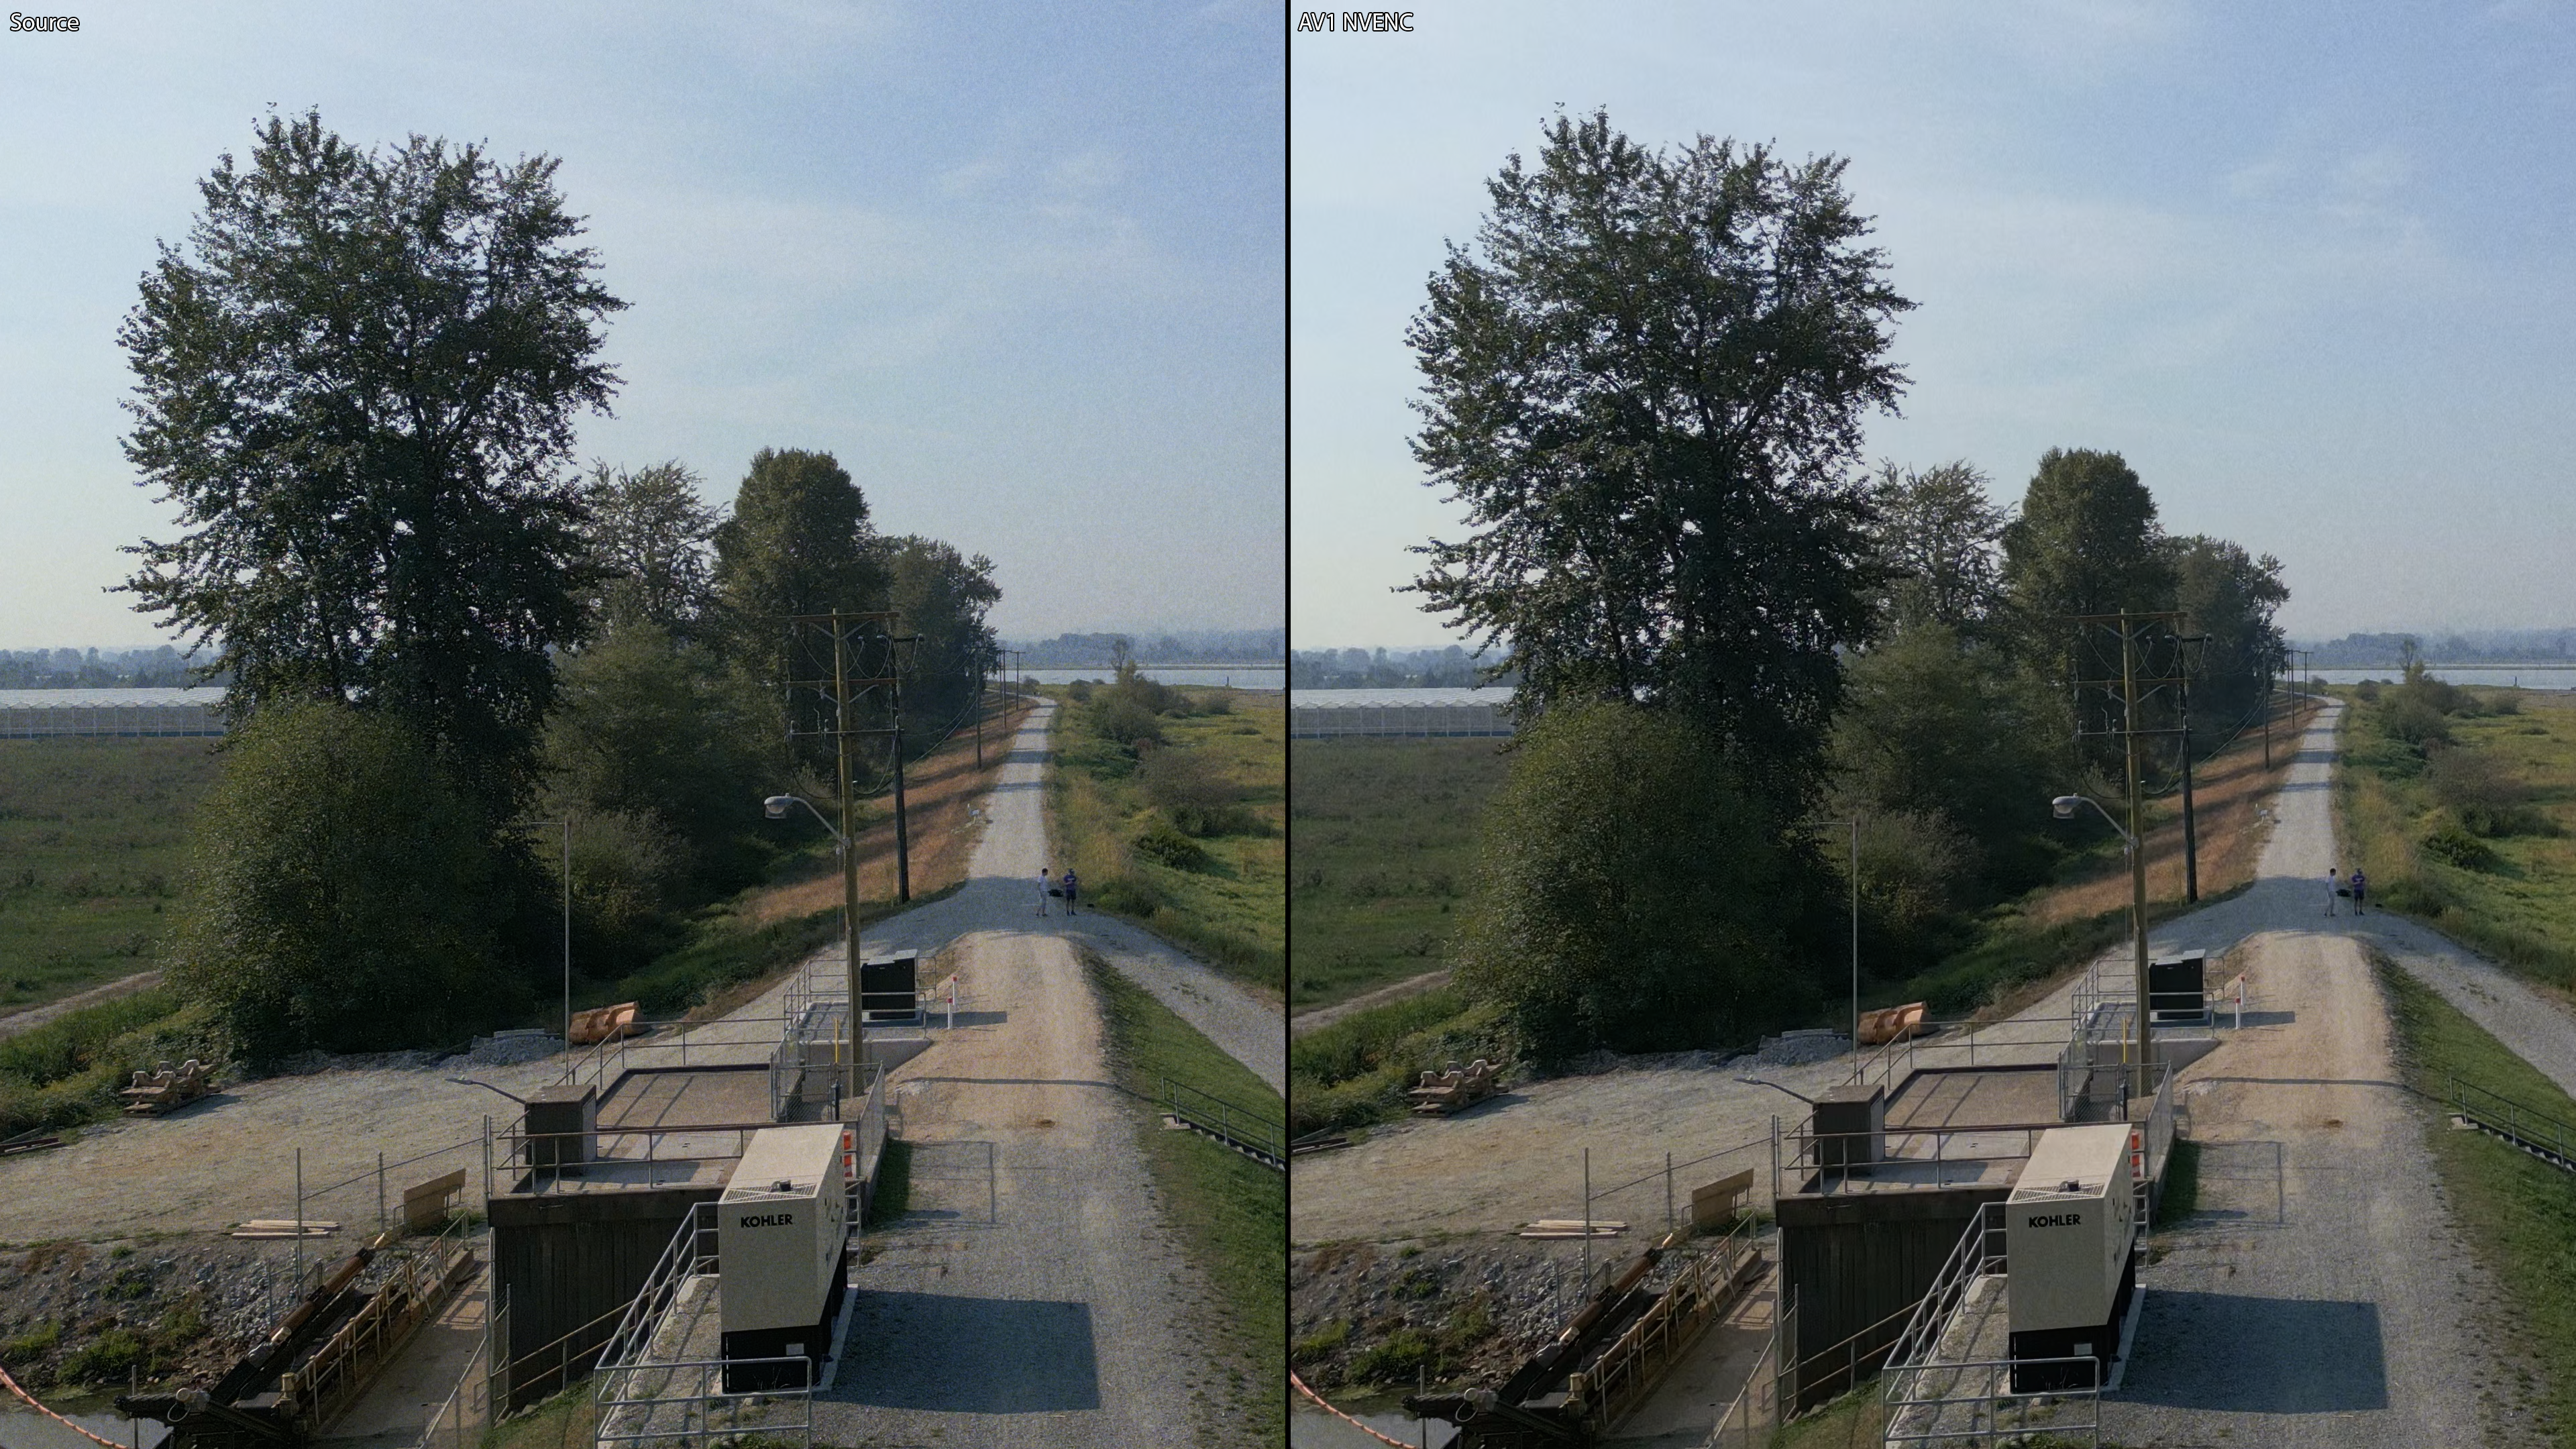
Click the image to download full-resolution PNG
In another example below, the anime, Sousou no Frieren also has original prominent film grain in the Blu-ray source only in certain parts of areas of scenes like in the sky. I compare it to a screenshot of the Netflix AV1 encoded version where you can see Netflix retains line work detail well, but obliterates the strong film grain aesthetic. This is largely due to the bitrate being quite low averaging 1,468 kbps which is likely around CQ 40 or higher. In my testing I found flim grain synthesis does not work on such videos with grain in only certain areas of the screen where it has been artifically placed in production. Therefore the NVENC AV1 command I have provided in theory (can't legally encode DRM protected content) will do a better job than Netflix at retaining some grain and original line work with a reasonable file size output. Don't forget the main benefit of encoding NVENC AV1 is the extremely fast encoding speed while still achieving better compression efficiency than NVENC HEVC or NVENC H.264.
Download a PNG side by side screenshot of the Blu-ray source (.iso) vs Netflix AV1 compressed version to see the difference:

Click the image to download full-resolution PNG
When viewing a Netfix show or movie in your browser, press Ctrl + Shift + Alt + D to find out what video and audio codec is playing back and more. Sousou no Frieren is AV1.
Next up: I will show you how to add metadata within the same FFmpeg command and remux for better organization, playback compatibility, or archival purposes.